As video content becomes more popular, video editing software becomes more accessible, too. However, if you own a low-end PC, finding a program that would work steadily might be challenging. Most video editors require a minimum of 8 GB or even 16 GB of RAM.
So, should you give up on the dream of becoming a video creator if you have a slow computer? Absolutely not. There are several great video editors for slow computers on the market, and for someone who is just starting, they might be quite enough. One of these programs is called VSDC, and in this article, we’ll review its capabilities.
But first, here are the minimum system requirements for running VSDC. Compare them to the specs of your computer if you’re looking for a lightweight video editor.
- OS: Windows XP SP3 / Vista / 7 / 8 / 10
- Processor: Intel, AMD or compatible processor with the working frequency at 1.5 GHz or higher
- Resolution: 1024 x 768px, minimum 16-bit color
- RAM: 512Mb for the program
- Disk space: 300 MB minimum
Now, don’t let the RAM field confuse you. If 512Mb is required for the program alone, you’ll need more than that to actually process videos, add effects, and apply changes. However, the good news is, many VSDC users confirm that the software works well with as little as 2GB of RAM. So, it’s definitely worth trying.
Interface Overview
When you launch VSDC for the first time, you’ll see multiple icons on the start screen, including the video capture tool and desktop screen recorder – both included to the suite. One level below, the most prominent features are highlighted: click on each feature and you’ll be sent to the related tutorial.
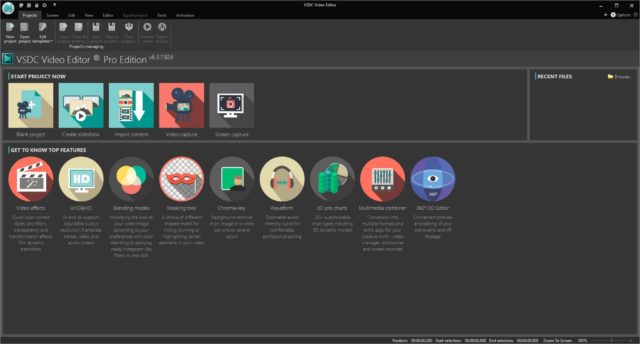
To get started, it is recommended to use the “Import content” button and select your main video file from the computer. The entire project will be adapted to the size of this main video.
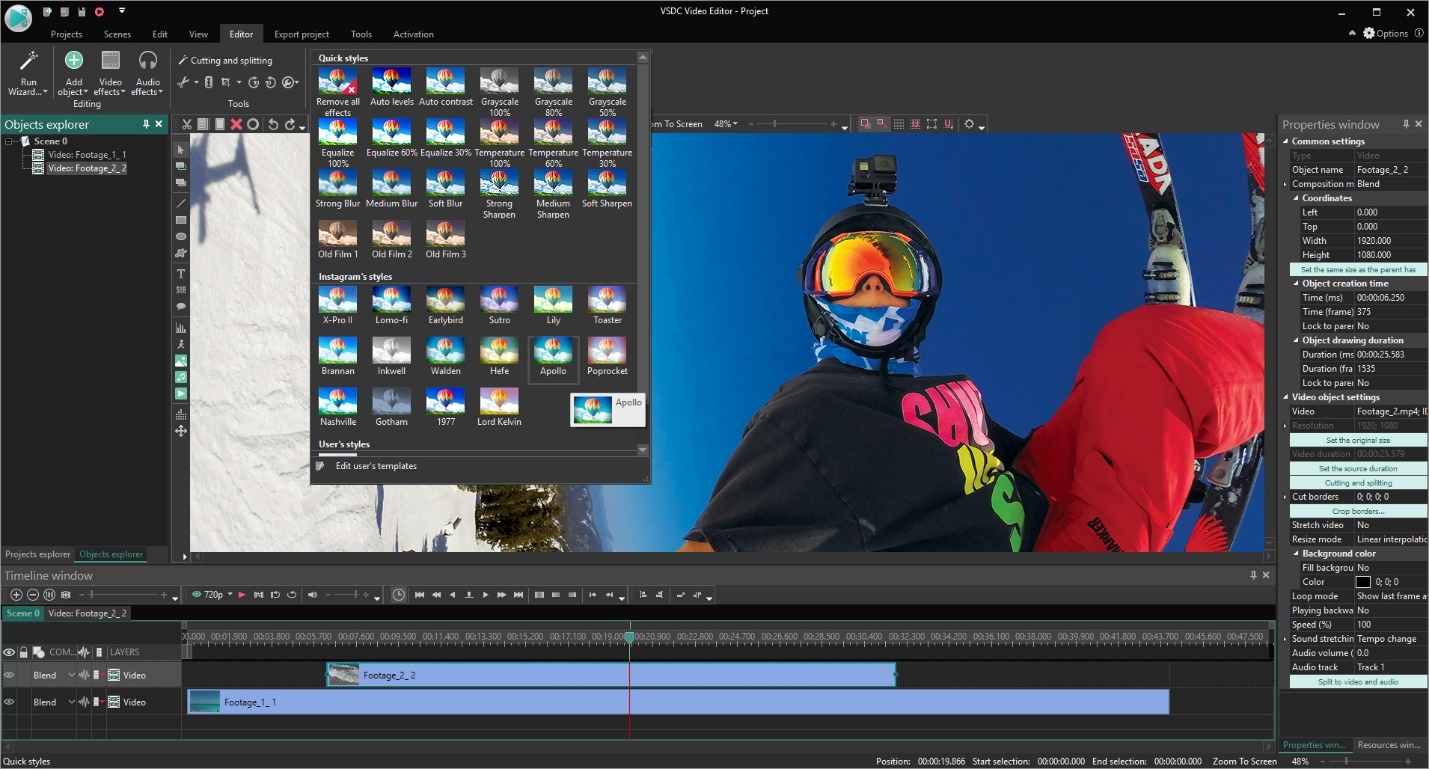
Now, the VSDC interface consists of the timeline, working area, preview window, several ribbon-style menus and the Properties window where you can fine-tune the parameters.
To add media files, text objects, shapes, or movement, you can use the dedicated buttons from the menu at the top of the interface. For most common operations, you can also refer to hotkeys.
Cutting, splitting, cropping, rotation tools are easily accessible in the quick “Tools” menu at the top.
Note that VSDC is a non-linear video editor which means that you can place several videos in one scene, create object overlaps, and blend several creatives into one composition. For example, you can easily create a picture-in-picture effect or add a watermark to your video by placing a piece of text or a logo over the footage and making it half-transparent.
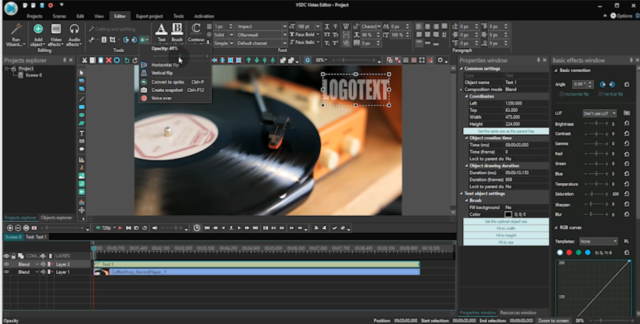
For each object in the scene, you’ll be able to set up the appearance and duration.
Video Effects
For such a lightweight video editor, VSDC is surprisingly powerful and brings a lot of tools on board.
The Video Effects tab located in the upper menu contains the following sections:
- Color adjustments
- Filters
- Transforms
- Transparency
- Special effects
- 360 and 3D video editing
- Transitions
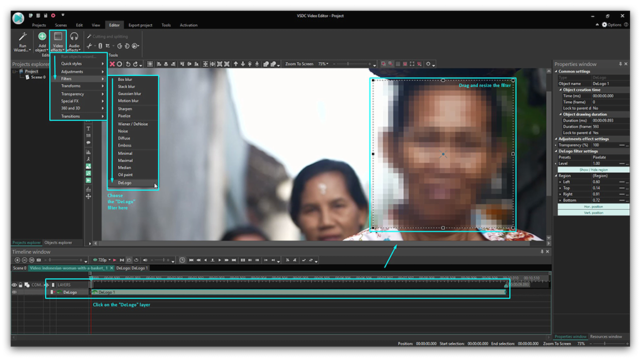
Once you apply any effect or filter, the Properties window slides in from the right-hand side, and you’re able to adjust the details. For example, if you want to blur an object in a video, you’ll need to open the “Filters” section and select the “Delogo” filter. And for this particular filter, the properties window will allow you to set up the type of a “censorship mask” – pixels, mosaic, or blur – and adjust its intensiveness.
Other noteworthy tools available in the VSDC are an audio spectrum visualizer and a background remover. The former helps you create beautiful sound animations, and the latter enables you to quickly erase background from a video recorded with a green screen.
Color Correction
VSDC brings several ways to work with colors, and you can choose the approach that feels most convenient.
First, there are quick styles that resemble Instagram filters. They can help you make a video look more vivid, achieve the old movie effect, or apply monochrome. You may also want to try out LUTs popular among professional videographers.
Next, you have the “Adjustments” section that will allow you to manually change such parameters as Hue, Saturation, Contrast, and more.
Finally, there are RGB and Hue & Saturation color wheels.
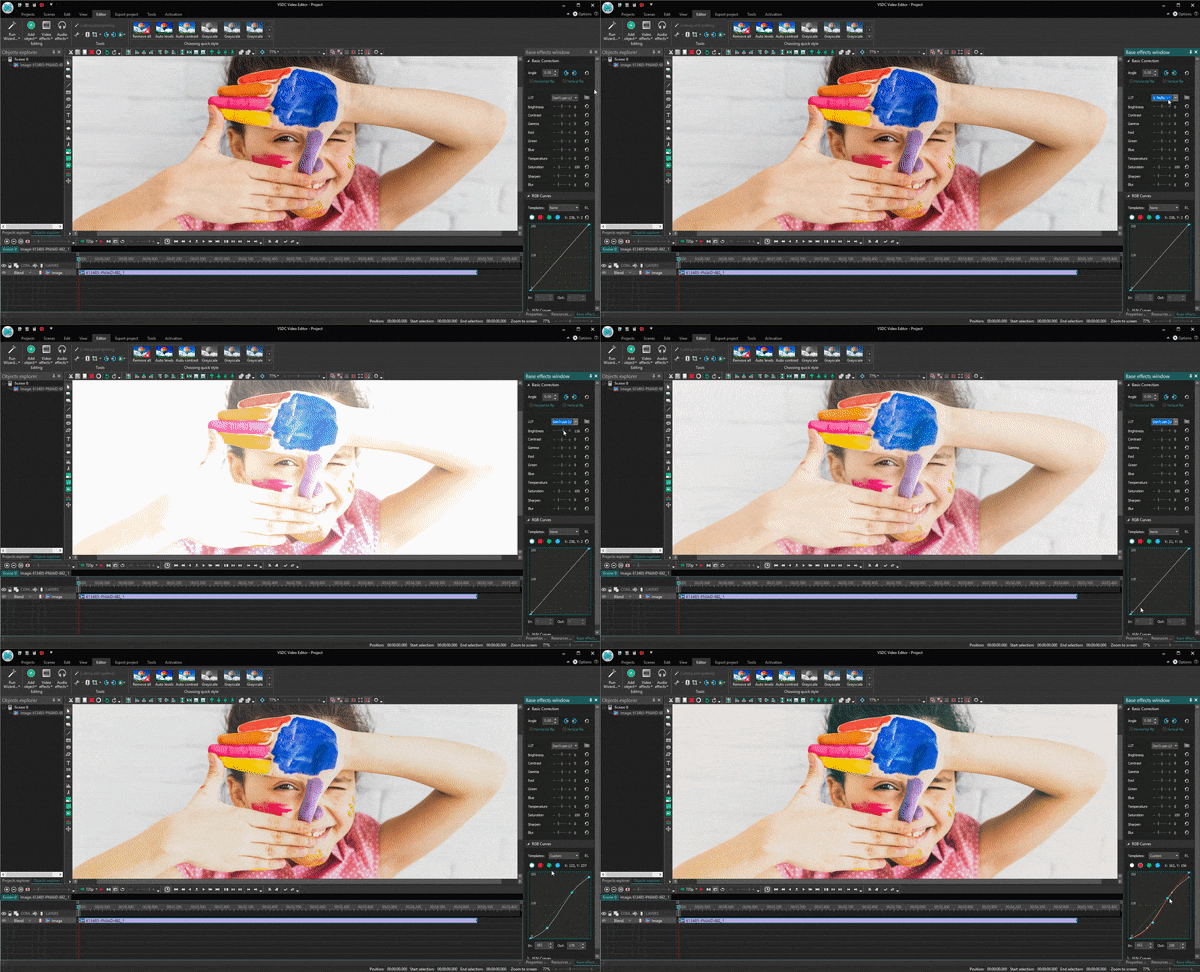
If you are familiar with the principles of color grading, these tools will give you the most control of the image. Using the color correction curves, you’ll be able to achieve a Hollywood-level look even if the original video was shot with poor lighting.
Video Export
One of the biggest competitive advantages of VSDC is its format compatibility. That means the software easily reads any footage no matter which format it is. What’s more, VSDC also enables you to save videos in any format, codec, and size after you finish editing.
When you’re ready to export a video, you’ll need to select two parameters: device and format. Based on your selection, the program will suggest the best settings for your video that you can adjust according to your goals.
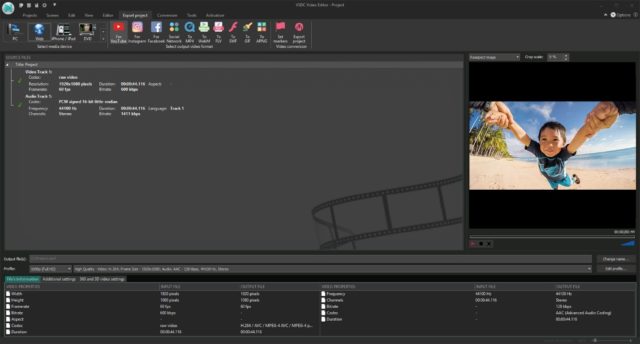
There are also five social media export profiles that help you save videos with the best settings for a chosen platform: YouTube, Instagram, Facebook, Twitter, and Vimeo.
Wrap-Up: Is VSDC Worth Your Attention?
If you are looking for a lightweight video editor because your computer is outdated and unable to run more resource-consuming software – you should check VSDC out. And if you take the time to get familiar with the settings, its potential goes way beyond basic video splitting and merging. With VSDC, you’ll be capable of producing a professional-level clip worth the attention of a wider audience.
